The reference transport plan
Describe reference trains and their relations, read coverage day by day, link train paths, instantiate dated trips.
The Reference transport plan screen manages the offers (train offers) of a timetable period: what the customer expects. Here you describe each reference train, split it into relations, cover each relation with train paths, and follow the result day by day. It is also where customer commitments, ITU capacities and the instantiation of dated trips are managed.
Required right Read transport plans
The screen opens from the Reference transport plan card of the dashboard, from the week view by clicking the name of an offer, from the Train paths screen by clicking a linked relation, or directly at …/rail/train-offers. The read right on transport plans is enough to read everything; each action needs its own right, listed below.
Finding your way
- The period
The selector at the top left lists the timetable periods by code. On opening, the screen lands on the period that contains today’s date, otherwise on the one with the latest end date. The whole list is restricted to the chosen period, and changing it closes the detail panel. Without any period, the screen says so: one has to be created first.
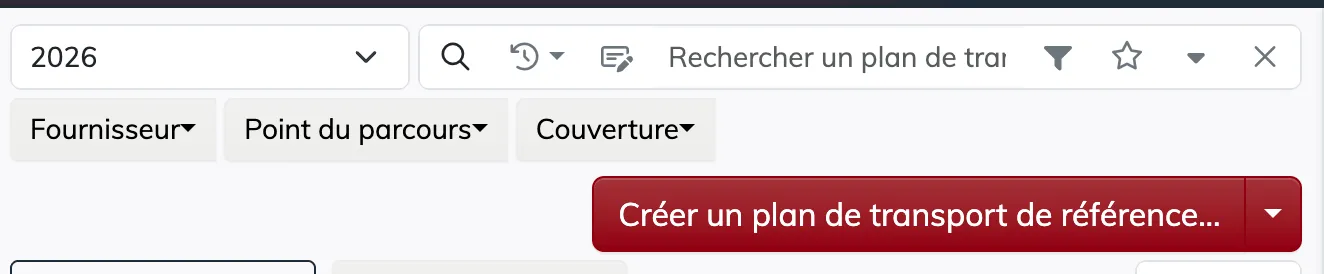
- Search and filters
The search bar is full text, with a history and favourites; several terms are separated by commas. The filter button opens three filters: Supplier (a railway undertaking), Route point (a PR, searched by name or code) and Coverage (multiple choice among Covered, Partial, Not covered, Over-covered, the status of the relations).

- Sorting and groups
Sorting is by creation date (default, newest first) or by number. On a wide screen, the group bar groups the list by Name, Axis, Supplier or Train path (the number of the linked train paths). Groups can be nested; each group is a folder band, with its name and item count, that a click opens or closes. Items without a value go under (empty), at the end of the list.

The list loads in batches: a “Show more…” button at the bottom of the list or of a group loads the next one. Period, search, filters, sort, groups and selected offer are carried by the page address: the link can be shared, and the state survives a refresh.
Reading a card
A click on a card selects it and opens its detail on the right; a second click deselects it.
| Area | What it says |
|---|---|
| Status badge | straddling the top edge: Active (green), Draft (orange), Archived (grey) |
| Identity | the short number in brackets, [12], the name (the train number) and the period code; on the right, the supplier’s logo and name if set |
| Actions | the pencil icon to edit, and a menu: Duplicate offer…, Instantiate plan…, Create a train path from this plan…, Delete offer… (in red). Visible with the edit right, outside multi-select mode |
| Application | a dotted box: the 7 day cells (running days in blue) and the label, MO-FR |
| Route | the departure time at the origin, one chip per intermediate point (name and time), the arrival time at the destination with the orange superscript +N if it falls on a later day. Without an intermediate point, a simple arrow |
| Relations | one row per relation: the coverage badge, the name, the coverage rate in % with its bar, and the “N train paths” chip. The left border of the row takes the coverage colour. Without a relation: “No relation” |
Coverage colours are the same everywhere in the module: Covered in green, Partial in orange, Over-covered in blue, Not covered in red.
The detail panel
Selecting an offer opens the panel on the right. Empty, it shows “Select an offer to see its detail.”
The header
The short number, the name, the status badge and the period code; then “Origin and time → Destination and time (+N) · N stops”; then the 7 running-day cells and the application label.
The detailed route
The “See detailed route” link only appears if at least one HLR or MAD is set. Expanded, it shows one row per point: a marker (filled for the origin and destination), the point’s name and code, arrival / departure with the +N superscript in case of a day shift, and coloured chips Customer HLR, RU HLR (purple), RU MAD, Customer MAD (blue). Each chip shows the first time and +N if there are several; on hover, the tooltip lists every time with its equipment constraint.
Dated trips
Once the offer has been instantiated at least once, a “Dated trips” link appears, with the counters N instantiated (green) and N pending (orange) and the date range. Expanded, it is a calendar by month (one row per weekday, one column per week) where each instantiated day is coloured green (Instantiated) or orange (Pending). The current week is outlined in dotted lines and the calendar opens on the current month. On hover of a day: the date, the status and the trip number.
The relation strip
- Choosing the relation
A “Relations (N)” band, with the “Add” button on the right, then a horizontally scrolling list, one tile per relation: the short number, the name, the coverage badge, the rate in %, “N train paths”, and “departure → arrival”. A click selects the tile, underlined in blue. The first relation is selected by default: the whole lower part of the panel is about the selected relation.

- Editing or deleting a relation
On the selected tile, or on hover, the Edit and Delete icons appear, in the Coverage tab only. See below, Relations.
Under the strip, three tabs: Coverage, Commitments, Capacity.
The Coverage tab
This is the working tab: it says, day by day, whether the selected relation is covered, and by which train paths.
The coverage calendar
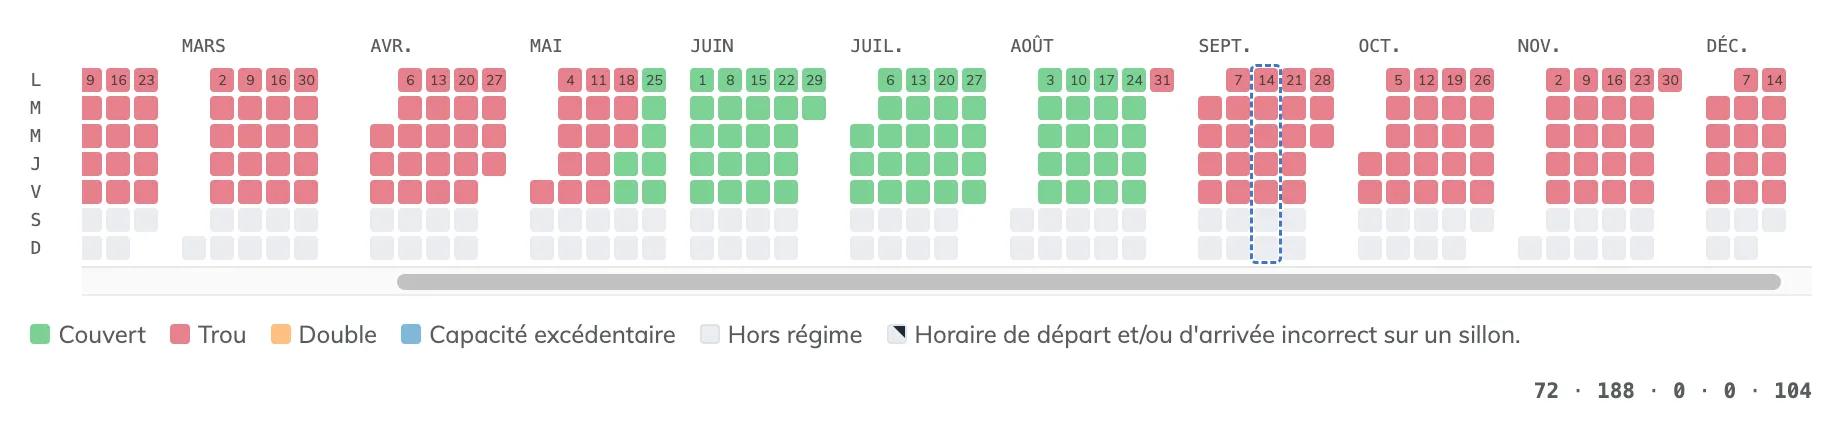
The “Coverage” card shows the whole period, in monthly blocks: one row per weekday, one column per week. The current week is outlined in dotted lines and the view opens on the current month. Day numbers are shown on Mondays, and for the whole month on hover.
| Colour | Status | What it means |
|---|---|---|
| Green | Covered | the relation runs and exactly one train path covers it |
| Red | Gap | the relation runs and no train path covers it |
| Orange | Duplicate | several train paths cover the relation that day |
| Blue | Excess capacity | one or more train paths run on a day when the relation does not |
| Grey | Not running | neither relation nor train path that day |
| Black triangle in a corner | Incorrect schedule | a train path covering that day has a departure or arrival different from the offer’s |
To the right of the legend, the totals per status. A day’s tooltip gives the date, the list of train paths covering it (No. v.variant) or “No train path covers this day.”, and the incorrect-schedule alert if any.
- Filtering by day
Clicking a day filters the Linked train paths card on the train paths covering that date; the day is outlined in blue. Clicking the same day again removes the filter, and so does changing relation.
Linked train paths
The “Linked train paths (N)” card lists the links between the relation and train paths. In the header: the counter, the filtered-date chip (with ✕ to remove it) if a day is selected, and the “Add a train path…” button. Then one tab per link, named after its first train path.
A link chains one or more legs, joined by a chain icon. For each leg:
- the train path’s
No. v.variant, with the “Open train path” link that opens the Train paths screen on that train path; - on the right, the origin → destination of the whole train path, and its comment;
- the list of the train path’s points between the leg’s departure point and arrival point: a filled marker for Pick up / Drop off points, the
arrival / departuretimes with the leg’s+Nincluded; - the train path’s running days and validity;
- the red “Delete link” button (edit right).
Without a link, the card shows “No linked train path”, an explanation and the “Add a train path…” button. With a date filter and no result: “No train path covers the selected date.” and a button to remove the filter.
Link a train path to a relation
Required right Edit transport plans
The “Add a train path…” button of the Linked train paths card opens the “Add a train path to the relation” modal. A relation can be covered by a single train path, or by several chained train paths whose points connect.
- Reading the reminder and the checks
At the top, the code and name of the departure point → those of the arrival point of the relation. Then two global checks, grey while pending, green or red afterwards: “The train path’s departure matches the relation’s departure” and “The train path’s arrival matches the relation’s arrival”.

- Choosing the first leg's train path
The Train path field searches among the period’s train paths. On the first leg, only train paths that pass through the relation’s departure point as a Pick up / Drop off point without ending there are offered. On selection, Departure point and Arrival point are pre-filled: the point matching the relation’s departure, and the last point matching its arrival, otherwise the train path’s destination.
- Adjusting the points and the +J
The Departure point and Arrival point lists only offer the train path’s eligible points (origin, destination, Pick up / Drop off points), in the format
CODE, Name (HH:MM). The +J is the leg’s day shift, fixed at 0 for the first leg. A leg check verifies that the departure precedes the arrival: Valid schedule or invalid. - Chaining a leg
“+ Add a leg” adds one: the train paths offered are then those passing through the previous leg’s arrival point. The junction between two legs is checked: Valid junction, or Nodes do not match if a leg’s arrival point is not the next leg’s departure point; and the arrival,
+Jincluded, must precede the next departure. The bin icon removes a leg when there are several.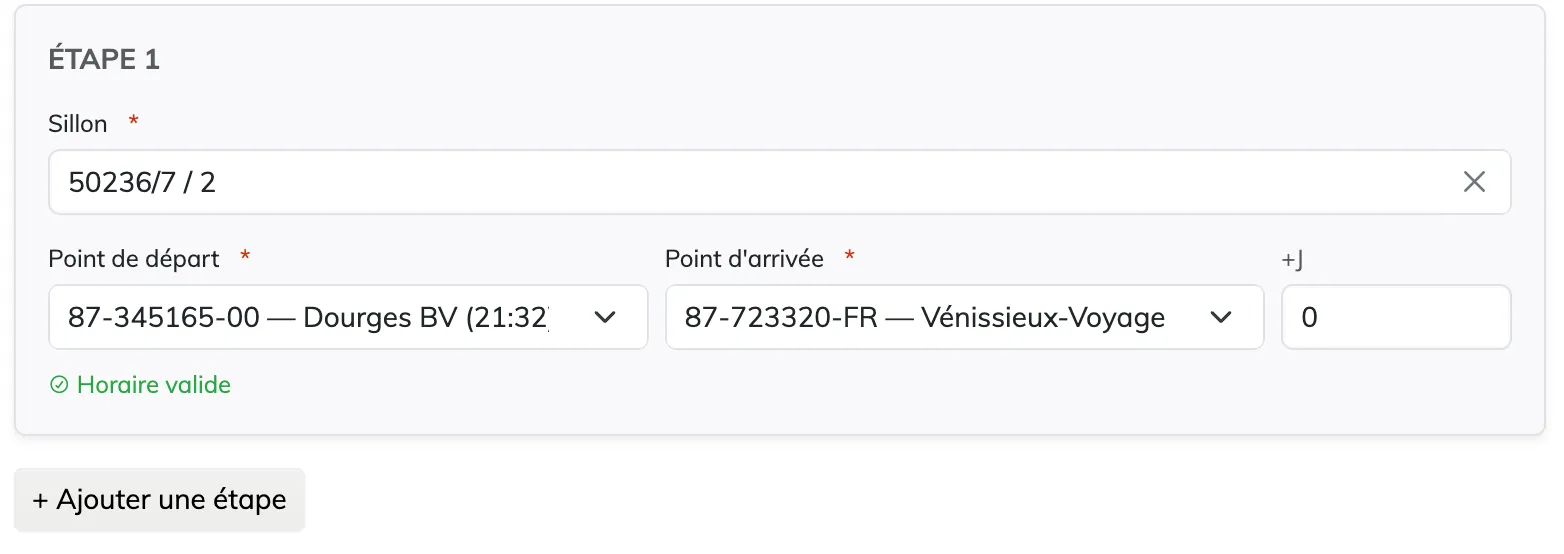
- Saving
Save becomes active when every leg, every junction and both global checks are valid. Message: “Link created successfully.” Coverage is recalculated at once, and the calendar and cards reflect it.
Relations
Required right Edit transport plans
- Adding or editing
“Add” in the Relations band, or a tile’s pencil icon, opens the modal. The Name is proposed in the form
DEPARTURE → ARRIVAL(short codes) as long as it has not been typed by hand. Departure and Arrival are chosen among the points of the offer’s route, origin and destination by default. The departure must precede the arrival along the route: otherwise a warning is shown and saving is blocked.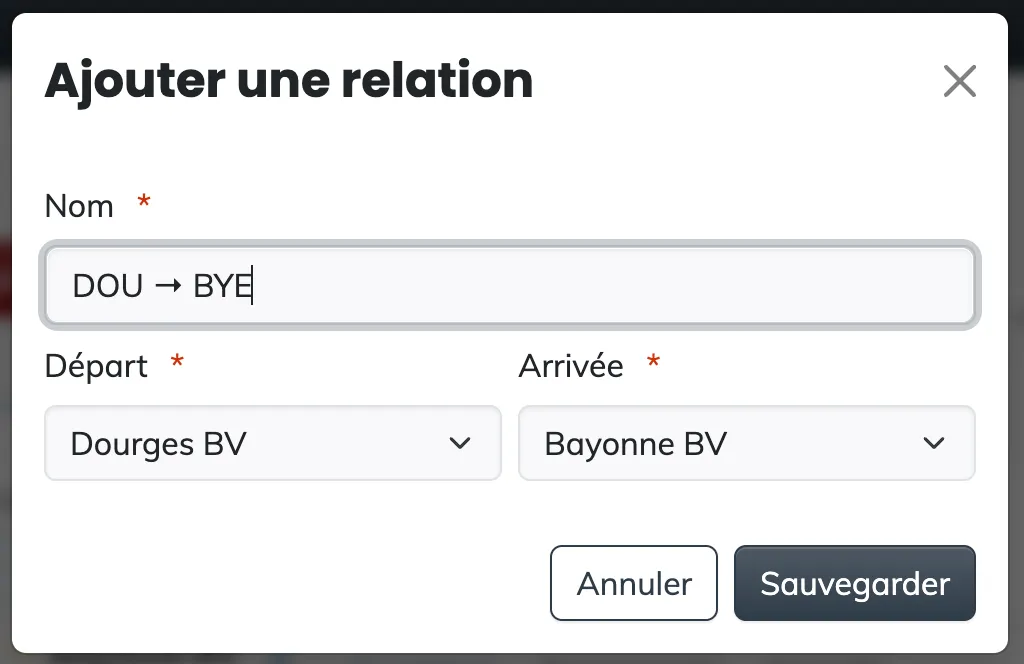
- Deleting
A tile’s bin icon asks for confirmation: “Are you sure you want to delete the relation …?” Its links, commitments and the coverage that goes with them disappear with it.
The Commitments tab
Required right Edit customer commitmentsDelete customer commitments
The customer commitments of the selected relation: the volume of ITUs a principal commits to entrust on this relation, by category and by period.
- The search (with history and favourites) and the Principal filter narrow the table. Grouping is by Principal (default) or ITU category; sorting by ITU category (default), Creation date or Quantity.
- The table: Principal · Origin (platform) · Destination (platform) · Quantity · ITU category, and the actions Edit, menu Duplicate… / Delete….
- “Add” opens the modal; Duplicate opens it pre-filled and creates a new commitment; Delete asks for confirmation.
| Modal field | What it expects |
|---|---|
| Principal (required) | the customer behind the commitment |
| From (required) / To | the commitment period, by default the dates of the timetable period |
| Origin (required) | a platform attached to the relation’s departure terminal, pre-selected if there is only one |
| Destination (required) | a platform attached to the relation’s arrival terminal, pre-selected if there is only one |
| Quantity (required) | the number of committed ITUs |
| ITU category (required) | P400, High cube, Small box, Large box, Other |
The Capacity tab
Required right Edit transport plansDelete transport plans
The offer’s ITU capacities, shared by all its relations: how many ITUs of each category the train can carry. A Quantity · ITU category table with the actions Edit and Delete… (delete right), an “Add” button, and a two-field modal, Quantity and ITU category. One capacity per category: adding a second one shows “An ITU capacity already exists for this category.” Without a capacity: “No result”.
Creating, editing, duplicating an offer
Required right Edit transport plans
The three actions open the same three-step modal, 1 Application, 2 Constraints, 3 Route, presented as a clickable stepper. Next stays disabled while the current step is invalid; a step already passed but invalid is flagged in red; Save, on the last step, becomes active when the whole form is valid.
| Action | Modal title | What happens |
|---|---|---|
| “Create a reference transport plan…” | Add a reference transport plan | blank form |
| A card’s pencil icon | Edit the reference transport plan | pre-filled form |
| A card’s menu, “Duplicate offer…” | Add a reference transport plan | form pre-filled from the source offer; saving creates a new offer |
On creation as on duplication, the main relation origin → destination is created automatically, named after the points’ short codes. The search then lands on the new offer’s number, which is selected. The saved offer has the Active status.
- 1 · Application
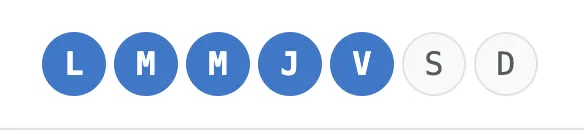
The Train number (required) is the offer’s name. The Application (required) is the calendar editor shared by offers and train paths, bounded here by the timetable period: 7 day buttons for the weekly pattern (Monday to Friday by default); a click on a day of the monthly calendar excludes it if it was running (RJJ) or includes it if it was not (AJJ), a second click cancels; a country’s public holidays are removed or added in bulk; “Clear added dates” and “Clear removed dates” reset. The simplified label is computed automatically and stays editable.
- 2 · Constraints
The Supplier (the railway undertaking) and the Axis (a reference list), optional. The technical constraints: maximum length (m), maximum weight (t), maximum speed (km/h), loading gauge. The week view compares these values with those of the train paths covering the offer.
- 3 · Route
Only PRs with a terminal are offered. The Origin (required): the PR, the departure time, and the Customer HLR and RU HLR lists (time, +J, equipment constraint). The intermediate points: “Add a point”, the bin icon to remove, the handle to reorder by drag and drop; each carries its PR, an arrival (time, +J, RU MAD and customer MAD) and a departure (time, +J, customer HLR and RU HLR). The Destination (required): the PR, the arrival time (+J), the RU MAD and Customer MAD lists.
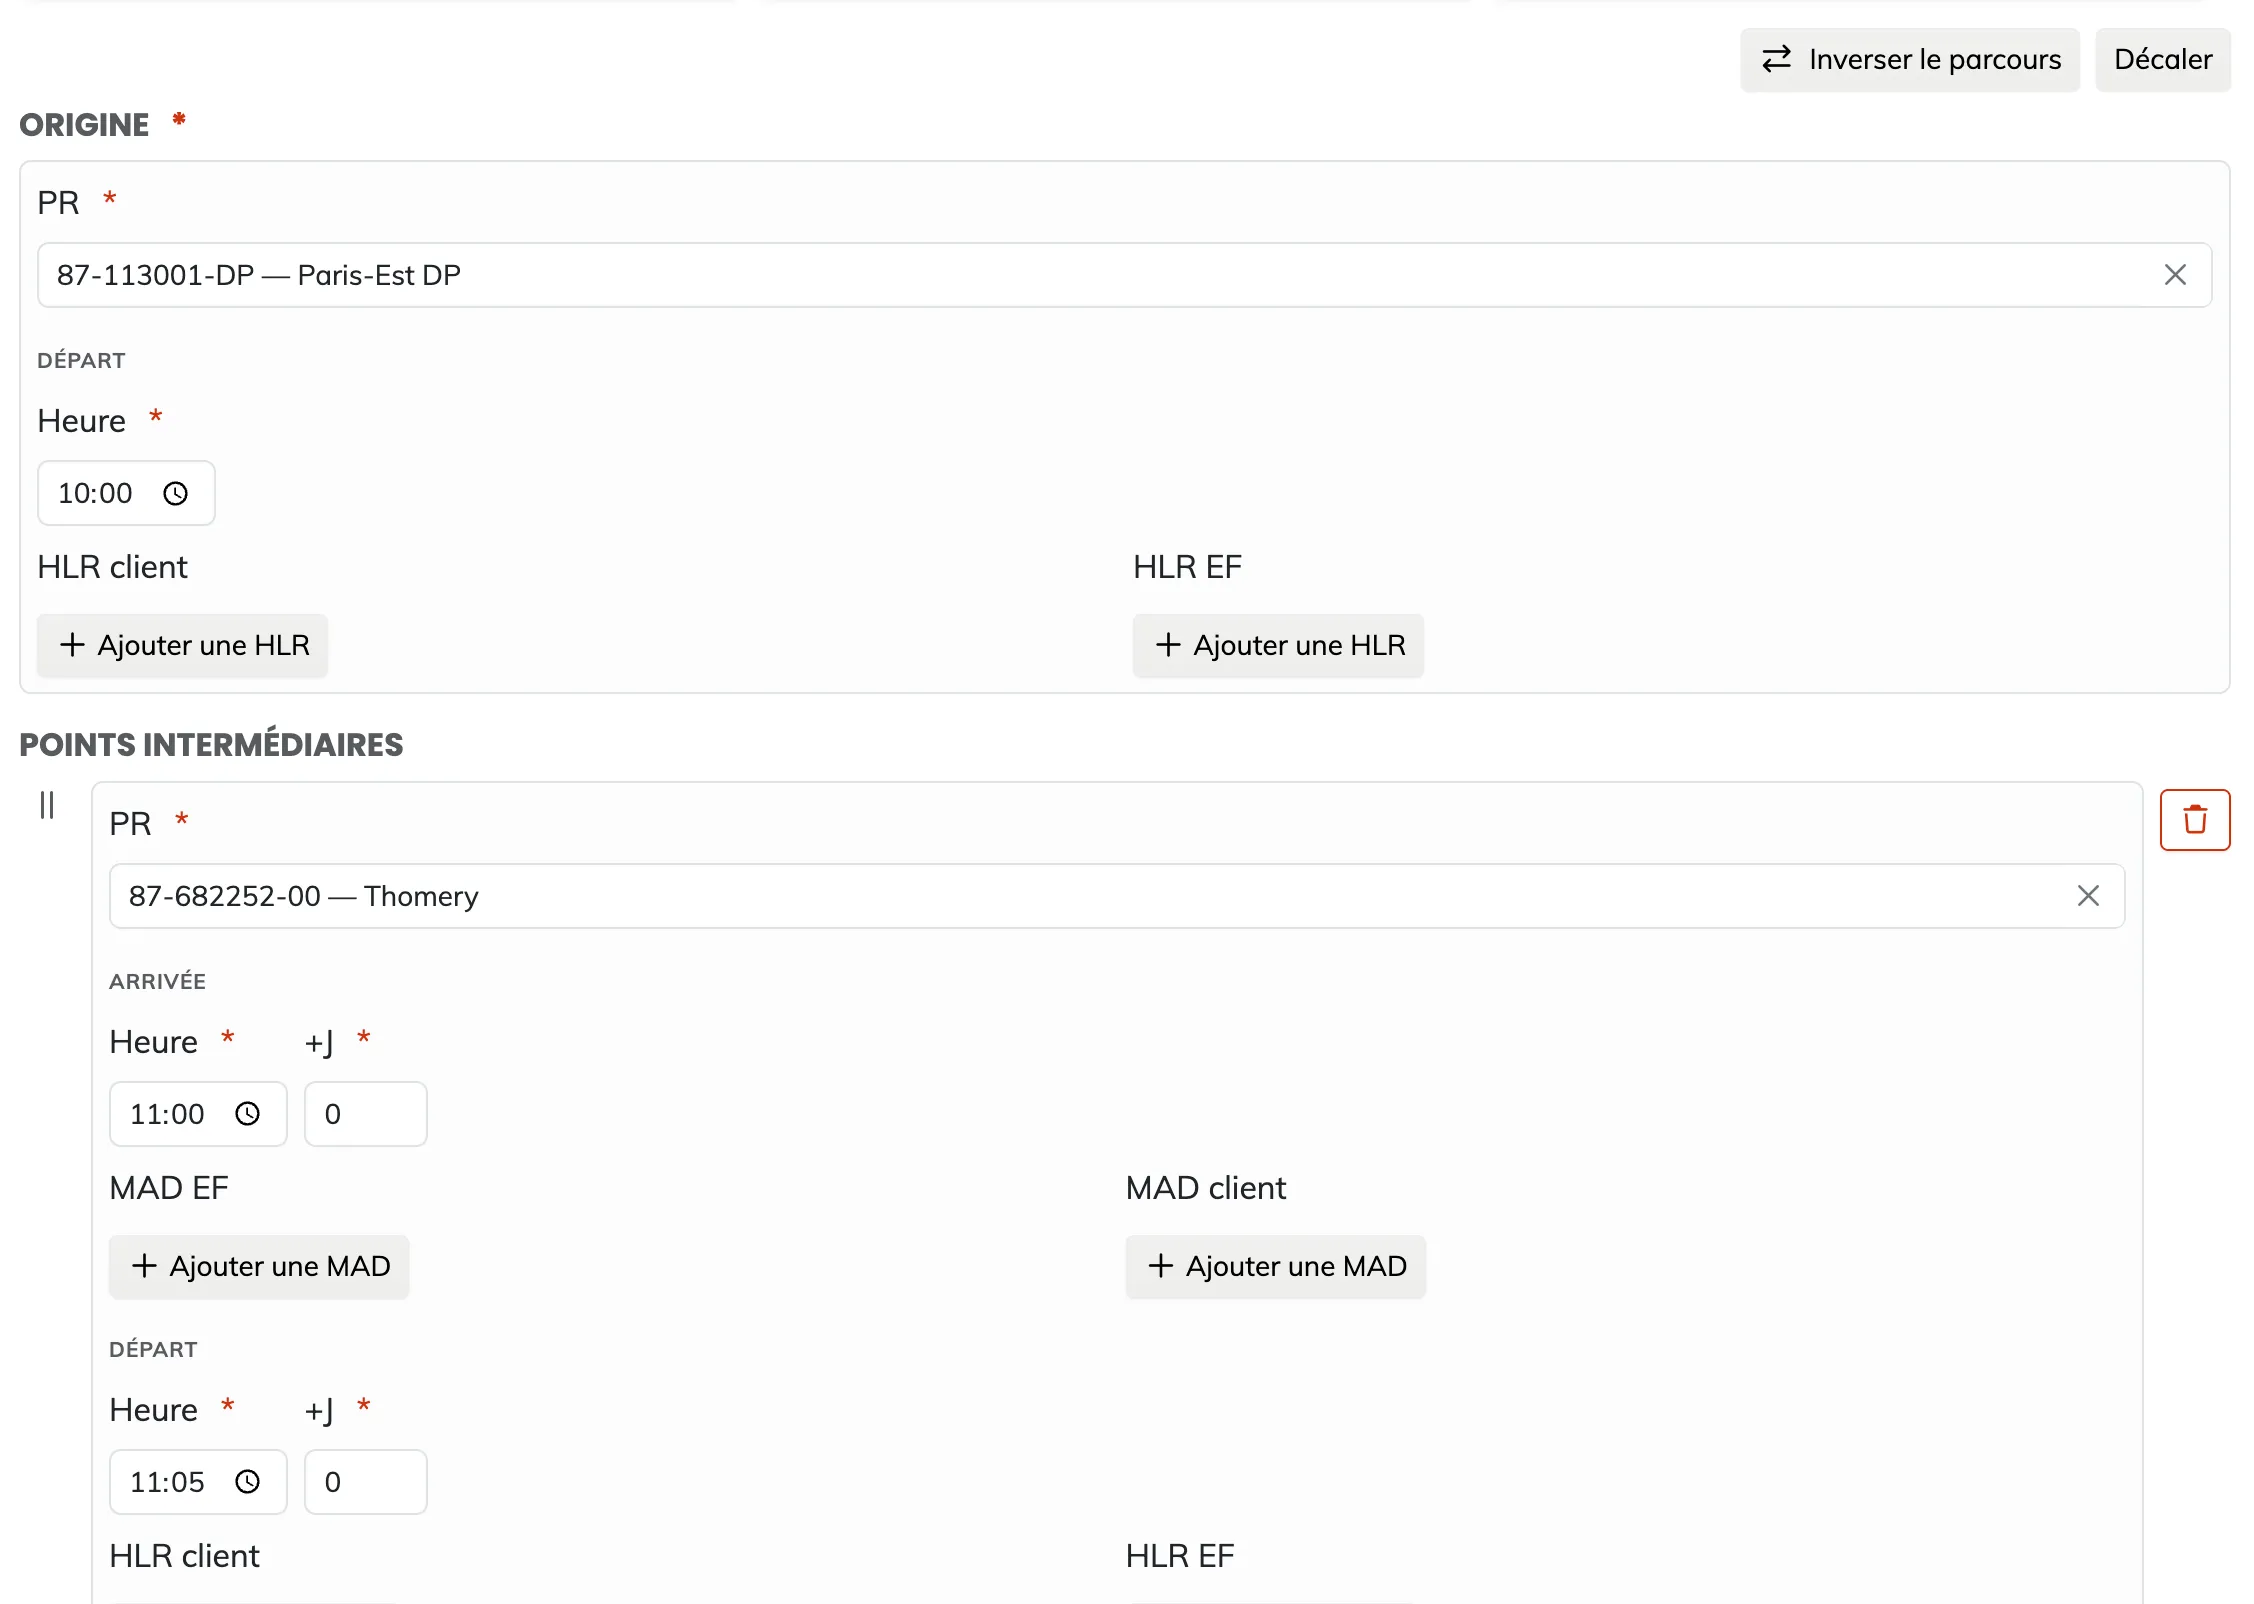
Route checks appear under the point or under the route: at a given point, the arrival precedes or equals the departure; at the departure, Customer HLR < RU HLR < Departure; at the arrival, Arrival < RU MAD < Customer MAD; and times, +J included, increase along the route.
Two tools, active when the form is valid: Reverse route swaps origin and destination and reverses the order of the points, keeping the departure time and recalculating every time in mirror, HLR and MAD included; Shift asks for a new departure time and shifts every time by the same offset.
Other actions on an offer
Create a train path from this plan
Required right Edit transport plansEdit train paths
A card’s menu, “Create a train path from this plan…”. The train path creation modal opens pre-filled with the period, the application, the supplier, the Active status, the origin, the destination, every intermediate point as Pick up / Drop off type, the HLR and MAD times, and the technical constraints. Message: “The train path was created from the transport plan.” The train path then exists, but it is not linked: it remains to link it to the relation.
Copy from another period
Required right Edit transport plans
- Copying a whole period
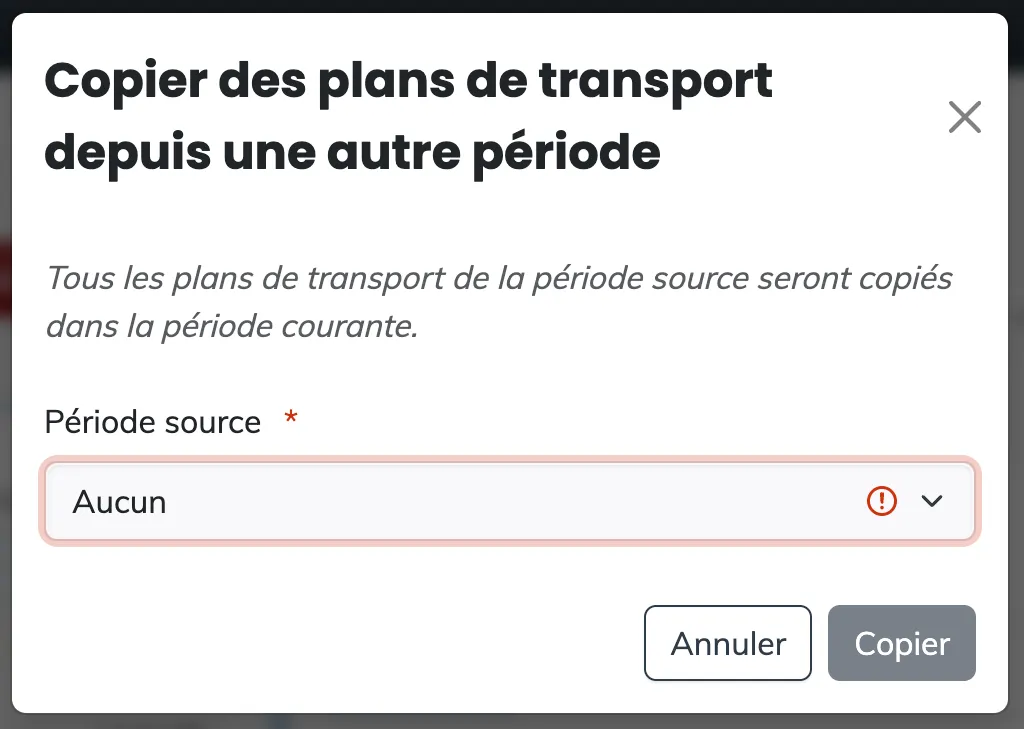
The create button’s menu offers “Copy from another period…”. The modal warns that every transport plan of the source period will be copied into the current period; you choose the source period (different from the current one), then Copy. Message: “The transport plans were copied.” This is the gesture at the start of a yearly service: start from the previous year, then adjust.
Delete an offer
Required right Edit transport plansDelete transport plans
A card’s menu, “Delete offer…”, in red. A confirmation names the offer: “Are you sure you want to delete the offer …?” The detail panel closes if the offer was selected.
Instantiate
Required right Edit transport plans
Instantiating an offer means generating its dated trips for the chosen dates. Processing is asynchronous: dates first become in progress, then instantiated.
One offer
- Choosing the dates
The header counters give the available, in progress, instantiated and selected dates. Quick actions add available dates to the selection: 7 days, 30 days, 90 days from today; This month, Next month, Whole validity; Invert and Clear the selection; a From / To range with “Add range”. In the calendar, a click on an available day selects or deselects it; on hover, the date, the status and, for an instantiated date, the trip number.

- Sending
“Instantiate N dates” sends the request; message “N dates sent for instantiation.” Days become in progress then instantiated as processing goes on.
| Legend | What it means |
|---|---|
| Available | the offer runs that day and the date is not yet instantiated |
| Available (excess capacity) | the offer does not run that day, but a train path is available on the main relation: the date can exceptionally be instantiated |
| Selected | the date is kept |
| Being instantiated | the request is sent, being processed |
| Already instantiated | a dated trip exists |
| Not in application | the offer does not run |
| Out of validity | outside the period |
A selection of offers
- Switching to multi-select
The toolbar’s “Multi-select” button shows a checkbox on every card; a click on the card checks or unchecks it, and the detail panel is no longer driven by the click. Every group band carries “Select all in group”. A floating bar appears at the bottom: “N plans selected”, Select all (every offer of the current search), Deselect all, Instantiate selection…, and ✕ to leave the mode.

- Instantiate N plans
The “Instantiate N plans” modal shows an aggregated calendar over all selected offers, from the earliest start date to the latest end date, with the same quick actions. A day is Available if it can be instantiated on at least one offer, Already instantiated if it is on all of them, Not in application if none runs; the tooltip says “Can be instantiated on X/Y plan(s)”. A warning flags dates already instantiated on some offers: those instantiations will be skipped, not redone.
- Following progress
Offers are processed one by one, with a progress bar “Plan i / N”, then a message sums up: “X instantiation(s) created on N plan(s).”
Summary of actions
| Action | Where | Required right |
|---|---|---|
| Change period | period selector | read |
| Select an offer | click on a card | read |
| Create an offer | “Create a reference transport plan…” button | edit plans |
| Copy from another period | create button’s menu | edit plans |
| Edit, duplicate an offer | a card’s pencil or menu | edit plans |
| Instantiate an offer | a card’s menu | edit plans |
| Create a train path from this plan | a card’s menu | edit plans and train paths |
| Delete an offer | a card’s menu | edit and delete plans |
| Multi-select, instantiate selection | “Multi-select” button | read; edit to instantiate |
| Add, edit, delete a relation | detail panel, Coverage tab | edit plans |
| Filter linked train paths by day | coverage calendar | read |
| Add a train path, delete a link | Linked train paths card | edit plans |
| Open a train path | a leg’s link | read |
| Manage commitments, propagate to trips | Commitments tab | edit commitments |
| Manage ITU capacities | Capacity tab | edit plans; delete to remove |
Behaviours
- A spinner on first load, an overlay while saving, skeletons while relations and links load, “No result” if the list is empty, a notification on server error.
- Cards appear progressively as you scroll.
- After each action (offer, relation, link, instantiation), the list and the panel are reloaded; coverage reflects the new links.
- The other screens open this one with the period, the search and the selected offer already in place.